Introduction: Why a DIY Kitchen Island Is a Game-Changer
A kitchen island is more than just an extra countertop — it’s the heart of a home. It’s where meals are prepared, conversations unfold, and family gatherings take place. But not every home comes with one built-in, and custom islands can be costly. That’s where a little creativity and IKEA’s versatile cabinet systems come in.
Building your own kitchen island with seating using IKEA cabinets allows you to achieve a designer look at a fraction of the cost. It’s practical, customizable, and ideal for both large and small kitchens. Whether you want extra storage, a breakfast bar, or a statement centerpiece, IKEA’s modular designs make it possible.
In this detailed guide, you’ll learn step-by-step how to plan, build, and style a kitchen island with seating — all using IKEA cabinets. From choosing the right cabinet series to adding a countertop and finishing touches, this guide covers everything you need for a stunning and functional DIY island that looks professionally made.
Why Build a Kitchen Island from IKEA Cabinets
IKEA cabinets are designed to be modular and adaptable, which makes them perfect for DIY projects like islands. Instead of buying a pre-made island or hiring a contractor, you can combine base cabinets, panels, and hardware to create a layout that fits your kitchen and lifestyle.
Another advantage is cost-efficiency. A custom-built kitchen island can easily run into thousands of dollars, while an IKEA version may cost only a few hundred, depending on size and finishes.
Flexibility is another major benefit. IKEA offers cabinet systems like SEKTION, METOD, or KNOXHULT, allowing you to mix and match widths, heights, and finishes. This flexibility means your island can have drawers for utensils, cabinets for cookware, or even open shelves for décor.
Lastly, IKEA parts are easy to replace or upgrade later — perfect for evolving homes or future remodels.
Planning Your Kitchen Island Layout
Before you start building, planning is essential. Your island should complement your kitchen’s layout without obstructing movement or workflow.
First, measure your kitchen space carefully. Leave at least 36–42 inches (90–106 cm) of clearance around all sides to ensure easy movement between counters, appliances, and the island. If you want seating, plan for 24 inches (60 cm) of space per stool.
Next, decide on the island’s main purpose. Is it for cooking, dining, or storage? A cooking island may need electrical outlets and a countertop resistant to heat, while a dining island should prioritize comfortable legroom and seating height.
Sketch your layout or use IKEA’s online kitchen planner tool to visualize how your island will fit within your kitchen. This helps determine how many cabinets and panels you’ll need and what kind of countertop will suit the design best.
Good planning ensures your island looks intentional and works efficiently within your kitchen’s flow.
Choosing the Right IKEA Cabinets
IKEA offers several cabinet series that can form the foundation of a kitchen island. The SEKTION system is the most popular, known for its strength, modular design, and customizable options.
For a clean, modern look, opt for flat-front cabinets like VOXTORP or KUNGSBACKA. If you prefer a more traditional style, BODBYN cabinets provide a timeless, classic appearance.
Select base cabinets that match your kitchen’s height — usually 30–34 inches tall before adding a countertop. If you want extra storage, mix drawers and doors for accessibility.
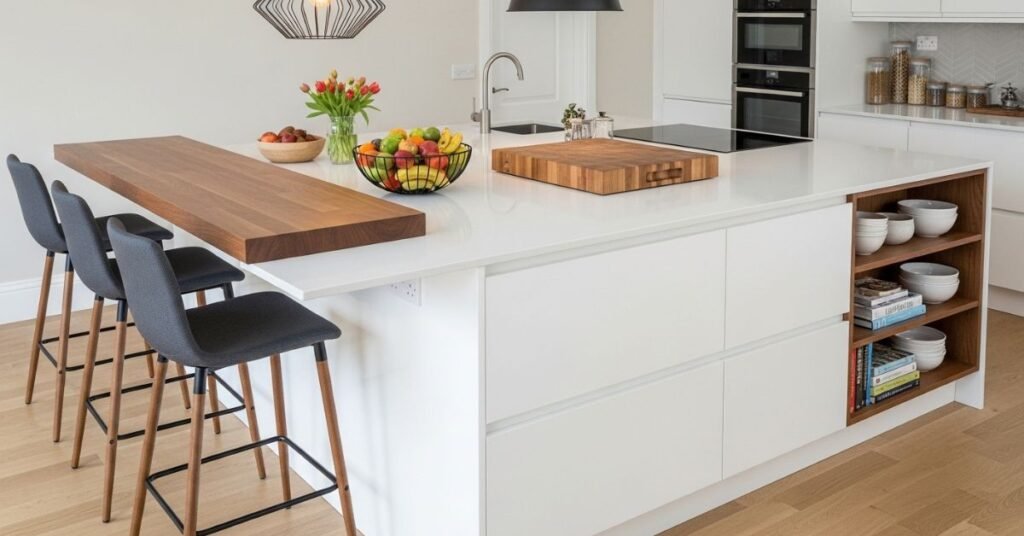
To include seating, plan to use shallower cabinets (12–15 inches deep) on one side and leave the opposite side open for stools. This balance creates a comfortable eating space while maintaining storage on the inside.
You can also combine cabinets of varying widths to create visual interest. IKEA’s modularity makes it easy to tailor the island to your exact needs.
Tools and Materials You’ll Need
Before starting construction, gather your materials and tools. You’ll need:
- IKEA base cabinets (SEKTION, METOD, or KNOXHULT)
- Toe-kicks and side panels (to cover exposed sides)
- Countertop (wood, laminate, or quartz)
- Back panels or beadboard (for the seating side)
- Screws, brackets, and construction adhesive
- Drill and screwdriver set
- Level and measuring tape
- Paint or finishing materials (optional)
- Stools or chairs for the seating area
Having all materials on hand ensures smooth assembly. IKEA provides hardware for the cabinets themselves, but additional supports may be needed for countertop overhangs or islands longer than 6 feet.
Step 1: Assemble the IKEA Cabinets
Start by assembling the IKEA base cabinets according to the instruction manuals. Lay out the panels, screws, and hardware, and follow each step carefully.
If you’re combining multiple cabinets, ensure they’re all level and flush before connecting them. Use clamps or temporary spacers to align them perfectly.
Attach cabinets together using screws through the frame sides, ensuring a tight and stable connection. Double-check measurements before drilling to avoid uneven alignment.
Once assembled, remove doors and drawers to prevent damage during construction. This also makes it easier to handle the cabinets when positioning them in your kitchen.
Step 2: Secure the Cabinets in Place
After assembling, position the cabinets in their final location. Use a level to ensure they sit evenly on the floor. Uneven cabinets can cause countertop gaps or alignment issues.
If your floor is slightly uneven, use shims to level the cabinets. Secure the bases together with screws through the side panels, and attach them to a floor support frame if needed.
For larger islands, you can build a base platform using 2×4 lumber for extra stability. This helps distribute weight evenly, especially if your countertop is heavy or oversized.
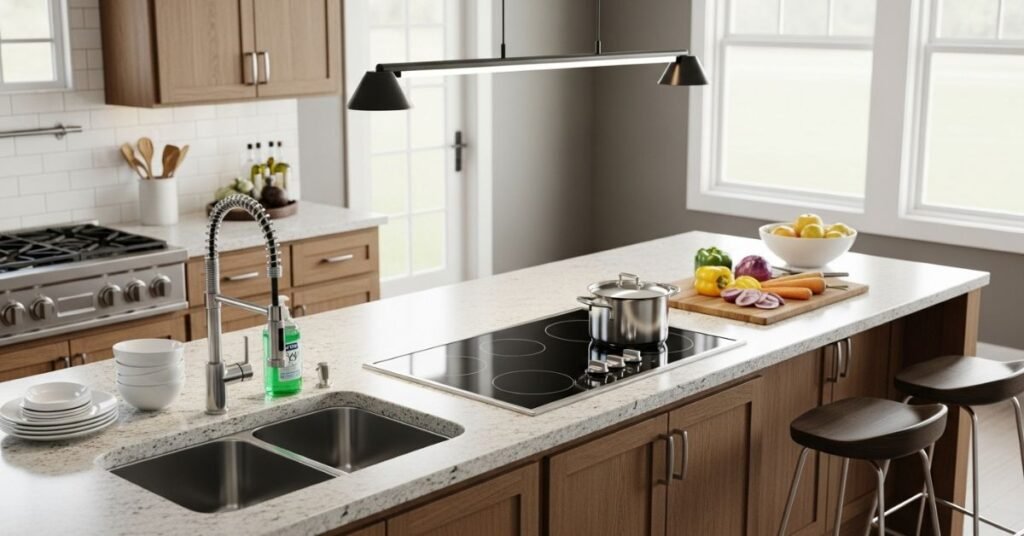
Step 3: Add the Countertop
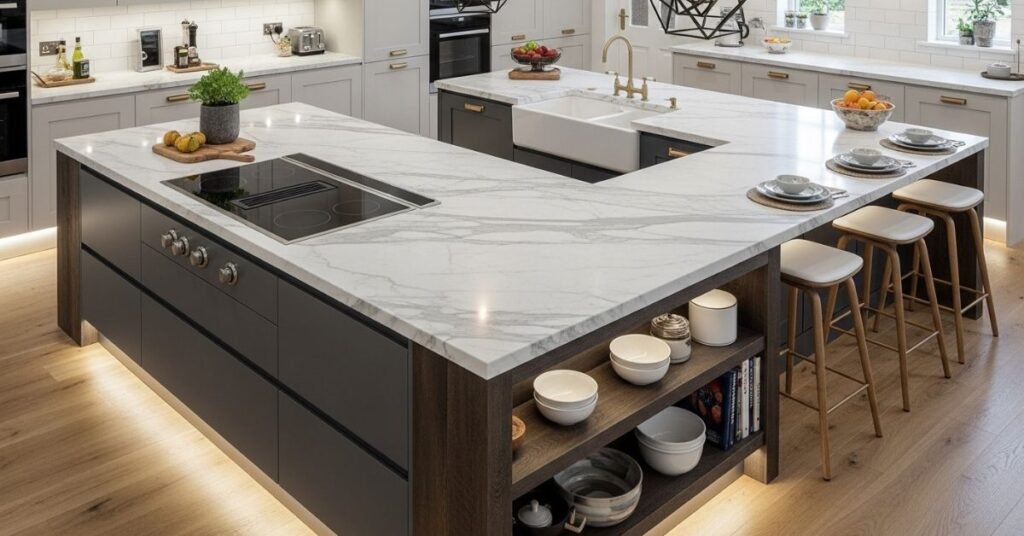
The countertop is the centerpiece of your kitchen island. Choose a material that matches both your style and usage needs.
- Butcher block adds warmth and can be sanded or oiled over time.
- Quartz offers a sleek, durable, and low-maintenance surface.
- Laminate is budget-friendly and available in many finishes.
When installing, ensure the countertop overhangs at least 12 inches on the seating side for comfortable legroom. Secure the countertop to the cabinets using construction adhesive and screws through the cabinet frame.
If you plan to add electrical outlets or a sink, cut out the necessary openings before installation. Always measure twice before cutting — countertop adjustments can be costly to fix.
Step 4: Create the Seating Area
For an island with seating, allow at least 24 inches of width per person and 12 inches of overhang for stools. If your family enjoys casual meals or entertaining, consider extending one side for more seating space.
Install brackets or corbels underneath the countertop to support the overhang, especially if it exceeds 10–12 inches. This prevents sagging and adds a decorative touch.
Choose seating that complements your kitchen’s design. Backless stools slide easily under the counter for smaller spaces, while high-backed stools add comfort in larger kitchens.
This setup transforms your island into a multi-functional hub for dining, homework, or socializing — without taking up extra space.
Step 5: Finish and Customize Your Island
Once your island is assembled, it’s time to personalize it. Cover the exposed cabinet backs with decorative panels, beadboard, or shiplap to give a polished look. Paint or stain the panels to match your kitchen’s color scheme.
You can also add trim, molding, or hardware for extra character. If your cabinets are plain, installing brass handles or black knobs can elevate the overall design.
For a modern touch, consider LED lighting under the countertop or along the island base. It adds warmth and enhances evening ambiance.
These small details make your island look like a high-end custom build instead of a DIY project.
Step 6: Add Electrical Outlets (Optional)
If your island will serve as a prep or cooking area, having outlets nearby is convenient. Before installation, check your local electrical codes or consult a licensed electrician.
You can install flush-mount outlets on the sides or inside drawers for a seamless look. Choose USB-compatible outlets to charge devices or power small appliances.
Proper planning ensures safety and functionality while maintaining the island’s clean aesthetic.
Design Ideas and Style Inspiration
Modern Minimalist Island
Use flat-front IKEA cabinets like VOXTORP in white or gray, paired with a quartz countertop. Keep accessories minimal and add slim metal stools for a clean, modern vibe.
Rustic Farmhouse Island
Combine BODBYN cabinets in off-white or beige with a butcher block top. Add wooden stools, shiplap paneling, and brass fixtures for warmth and charm.
Two-Tone Statement Island
Choose darker cabinets for the island (like navy or black) and lighter ones for the rest of the kitchen. This contrast creates a high-end, designer appearance that stands out.
Compact Kitchen Solution
Use narrow IKEA cabinets and a slim countertop for small kitchens. Include foldable stools to save space while keeping the island fully functional.
Cost Breakdown: What to Expect
The cost of building a kitchen island from IKEA cabinets varies depending on size, materials, and finishes. On average:
- IKEA base cabinets: $150–$500 each
- Countertop (laminate to quartz): $100–$700
- Trim, panels, and brackets: $50–$200
- Stools: $50–$300 each
- Total estimated cost: $500–$1,800
This is significantly cheaper than hiring a contractor for a custom island, which can cost anywhere from $3,000 to $8,000 or more.
DIY gives you full control over both budget and design, ensuring your island meets your unique needs.
Maintenance and Care Tips
To keep your IKEA island looking beautiful for years:
- Wipe spills immediately, especially on wood or laminate surfaces.
- Re-oil butcher block countertops every few months.
- Use cutting boards to prevent scratches.
- Avoid dragging stools that could mark the cabinet base.
- Periodically tighten screws and check brackets for stability.
Regular maintenance ensures your island stays both stylish and sturdy.
Common Mistakes to Avoid
- Ignoring spacing: Not leaving enough room for movement around the island.
- Skipping countertop support: Overhangs without brackets can sag or crack.
- Mismatched heights: Ensure your countertop matches adjacent counters for a cohesive look.
- Poor sealing: Exposed edges or seams can collect moisture and damage cabinets.
Planning and precision prevent most of these issues, ensuring a professional finish even on a DIY budget.
Actionable FAQs
1. Can I use IKEA wall cabinets instead of base cabinets for a kitchen island?
Yes, but only if you want a shorter island or a specific height difference. Wall cabinets are shallower, so they can work well on the seating side for legroom but aren’t ideal for the main structure.
2. How deep should an island with seating be?
For comfort, aim for a minimum depth of 36 inches, which allows space for cabinets and a seating overhang.
3. Can I paint or refinish IKEA cabinets?
Absolutely. IKEA cabinets take paint well if you sand and prime them first. This is a great way to achieve a custom look.
4. Do I need to attach the island to the floor?
If the island is heavy or includes appliances, yes. For smaller islands, securing the cabinets together and anchoring them with brackets usually provides enough stability.
5. How many people can sit at my island?
Allow 24 inches of width per stool. For example, a 6-foot island comfortably seats three people.
6. What countertop material is best for durability?
Quartz is the most durable and low-maintenance option. Butcher block adds warmth but requires more care, while laminate is affordable and versatile.
7. Can I add drawers or pull-outs to the island?
Yes. IKEA’s modular drawer inserts fit perfectly in base cabinets, making them ideal for utensils, cookware, or spices.
8. How long does it take to build an IKEA cabinet island?
Typically 1–2 days, depending on your skill level and whether you need to cut or customize parts.
9. How can I make my IKEA island look more custom?
Add decorative molding, paint panels, or upgrade hardware. Using a high-end countertop also instantly elevates the design.
10. Is an island with seating practical for small kitchens?
Yes — a compact island can double as a dining area and prep zone. Just make sure you maintain adequate walking space.
Conclusion: A Designer Island on a DIY Budget
Building a kitchen island with seating from IKEA cabinets is one of the most rewarding home projects you can take on. It combines function, style, and creativity in one centerpiece that elevates your kitchen’s entire look.
With thoughtful planning, quality materials, and attention to detail, your DIY island will look like a professional installation. Whether your goal is more storage, extra prep space, or a casual dining area, IKEA’s modular design makes it all possible — and affordable.
By following these steps, you’ll end up with more than just an island — you’ll have a personalized, multifunctional hub that brings family and friends together, all crafted by your own hands.