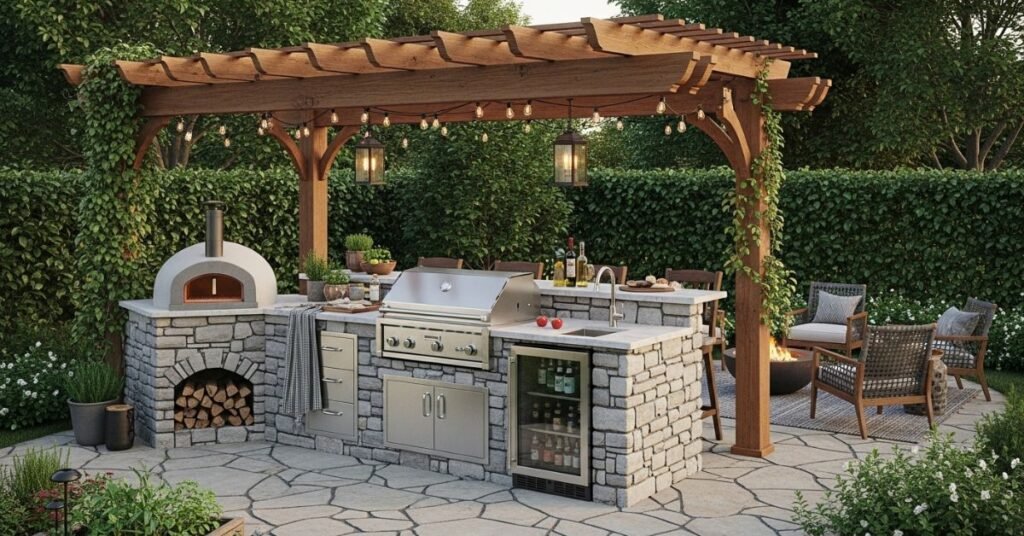
Dreaming of an outdoor kitchen but worried about the cost? You’re not alone. Many homeowners see visions of sprawling, custom-built entertainment zones with price tags that quickly dash their hopes. The good news is that creating a functional and stylish covered outdoor kitchen doesn’t have to drain your savings. With smart planning, creative material choices, and a focus on what truly matters, you can build an alfresco cooking space that enhances your lifestyle and fits your budget.
This guide will walk you through everything you need to know. We’ll explore inexpensive cover options, clever layout strategies, budget-friendly materials for countertops and cabinets, and affordable appliance choices. Get ready to discover how you can bring your outdoor culinary dreams to life without breaking the bank.
Why a Covered Outdoor Kitchen is a Smart Investment
Before we dive into the “how,” let’s talk about the “why.” Adding a cover to your outdoor kitchen is more than just an aesthetic choice; it’s a practical decision that multiplies the value of your space.
A cover protects your investment from the elements. Rain, harsh sun, snow, and falling debris can quickly damage grills, countertops, and furniture. A roof extends the life of your equipment and reduces the time you spend on cleaning and maintenance.
More importantly, a cover makes the kitchen usable in more weather conditions. A sudden summer shower won’t send your guests running inside, and a blazing sun won’t make cooking an unbearable chore. This significantly extends the seasons in which you can enjoy your backyard, giving you a better return on your investment through sheer usability. A covered space becomes a true extension of your home—an all-weather hub for family dinners, entertaining friends, and quiet morning coffees.
Planning Your Budget-Friendly Outdoor Kitchen
Successful, affordable projects start with a solid plan. Rushing into construction without clear goals is the fastest way to overspend. Take the time to think through these key areas before you buy a single item.
Define Your “Must-Haves” vs. “Nice-to-Haves”
The first step is to be honest about how you plan to use the space. This will help you prioritize your spending.
- The Grill Master: If your primary goal is grilling, focus your budget on a quality grill and a durable countertop for prep. A simple side burner might be a must-have, but a full-scale pizza oven can be a “nice-to-have” for a future upgrade.
- The Entertainer: If you envision hosting parties, you’ll need ample counter space for serving food and drinks, good lighting, and perhaps a dedicated beverage station. A sink might be a priority, but a dishwasher could wait.
- The Family Hub: For everyday family meals, simplicity is key. You’ll need a reliable grill, sufficient prep space, and comfortable seating. A high-end warming drawer is likely unnecessary.
Create two lists: one for the absolute essentials and another for features you’d like to add later. This simple exercise will guide every purchasing decision and keep your budget on track.
Location and Layout: The Foundation of Good Design
The placement of your outdoor kitchen impacts its cost and functionality. Choosing a spot adjacent to your house is often the most budget-friendly option.
- Proximity to the House: Building your outdoor kitchen against an exterior wall of your home can significantly reduce costs. You may be able to tap into existing utility lines (gas, electricity, water) for a fraction of the price of running new ones across your yard. This location also provides a natural windbreak and a solid structure to anchor a roof.
- Basic Layouts for Efficiency: You don’t need a complex U-shaped island to have a great outdoor kitchen. Consider these simple, cost-effective layouts:
- Linear Kitchen: This is the simplest and often cheapest design. All components—grill, counter space, sink—are arranged in a single line. It’s perfect for narrow spaces like a side patio.
- L-Shape Kitchen: This layout offers a more defined cooking zone and separates the prep area from the grilling area. It creates a natural corner for socializing and works well when built against a corner of your home or patio.
Remember to plan for workflow. The “work triangle”—the path between the grill (hot zone), sink (wet zone), and prep counter (dry zone)—should be efficient and unobstructed.
Inexpensive Ideas for Covering Your Outdoor Kitchen
The cover is a critical component, and it can also be one of the most expensive. Fortunately, there are many affordable and stylish ways to provide shelter.
Pergolas with Budget-Friendly Covers
A pergola is a classic choice that defines a space without the cost of a solid roof. This open-rafter structure provides a sense of enclosure and partial shade. To make it a true all-weather space, you’ll need to add a top cover.
- Polycarbonate Panels: Clear or tinted polycarbonate roofing panels are an excellent choice. They are lightweight, easy to install, and less expensive than glass. They block harmful UV rays and keep the rain out while still allowing natural light to filter through, so the space doesn’t feel dark.
- Shade Sails: For a modern, flexible option, consider shade sails. These durable fabric triangles or squares can be stretched over the pergola frame to provide targeted shade and rain protection. You can use multiple sails layered at different angles for a dynamic look. They are easy to remove and store during winter months if needed.
- Canvas or Outdoor Fabric: A retractable canvas canopy or a simple, tightly stretched piece of waterproof outdoor fabric offers a softer, more relaxed vibe. This is one of the most affordable solutions and allows you to control the amount of sun or shade you get.
Extending an Existing Roof or Awning
Why build a new structure if you don’t have to? Leveraging your home’s existing architecture is a huge money-saver.
- Patio Cover Extension: If you have a covered patio, consider extending it to shelter your new kitchen area. You can often match the existing roofing material for a seamless look. This approach utilizes the existing structure for support, saving on materials and labor.
- Retractable Awnings: A high-quality retractable awning mounted to your house wall can provide on-demand cover. While the initial cost might be higher than a shade sail, its flexibility is unmatched. You can extend it for protection or retract it to enjoy an open sky, all with the push of a button or the turn of a crank.
The Lean-To: Simple and Effective
A lean-to is a simple roof structure that slopes down from the side of your house. It’s a straightforward and highly cost-effective way to build a covered space. It requires fewer support posts than a freestanding structure and automatically directs rainwater away from your home’s foundation. You can use corrugated metal or polycarbonate panels for the roofing material to keep costs low.
Budget-Friendly Materials for Countertops and Structures
The materials you choose for the kitchen’s base and countertops have the biggest impact on the final look and cost.
Smart Countertop Selections
Forget granite and quartz for now. These materials are beautiful but expensive. Here are some fantastic alternatives that deliver durability and style on a budget.
- DIY Poured Concrete: For the hands-on homeowner, poured concrete countertops are a game-changer. The materials themselves are very cheap (cement, sand, water). While it requires some labor and attention to detail for building the mold and finishing the surface, the result is a custom, high-end look for a fraction of the price. Concrete can be stained or tinted to match any style.
- Large Format Tiles: Instead of small, busy tiles with endless grout lines to clean, opt for large format porcelain or ceramic tiles (e.g., 24×24 inches or 24×48 inches). They mimic the look of natural stone or concrete slabs but are much more affordable and easier to install. Fewer grout lines mean less maintenance and a cleaner, more modern appearance.
- Treated Wood or Butcher Block: For a rustic or modern farmhouse aesthetic, a thick wood countertop can be a warm and inviting choice. Use woods that are naturally resistant to rot and insects, like cedar, teak, or ipe. It is crucial to seal them properly with a marine-grade varnish to protect them from moisture and UV damage. Regular re-sealing will be required.
Affordable Cabinet and Base Ideas
Custom outdoor-rated cabinetry is expensive. Think outside the box to create storage and structure.
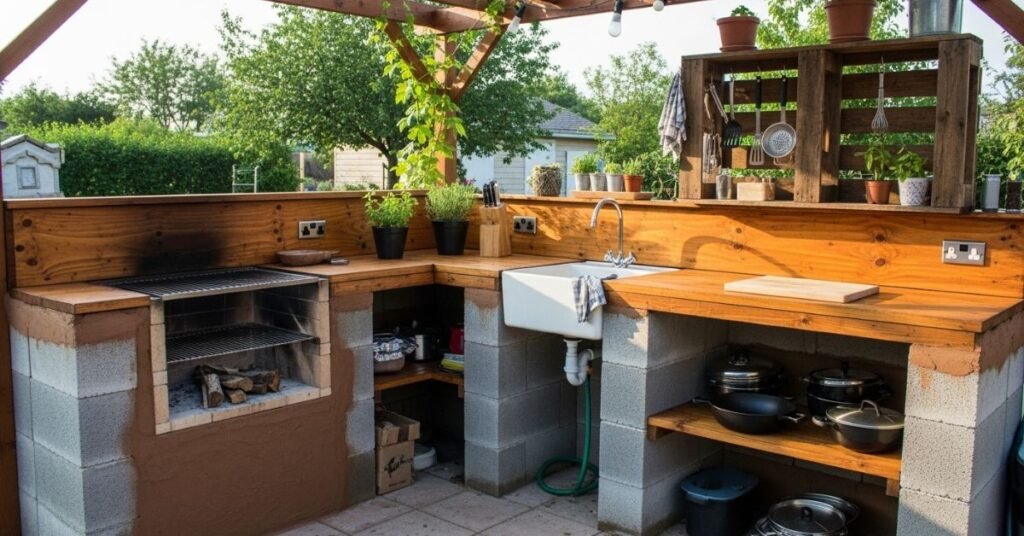
- Pressure-Treated Wood Frame: The most common and cost-effective method for building an outdoor kitchen island is to frame it with pressure-treated lumber. This wood is resistant to moisture and insects. You can then clad the frame in a material that suits your style.
- Cinder Block Construction: For an industrial or modern look, a base built from stacked cinder blocks is incredibly durable and inexpensive. You can leave the blocks raw, paint them, or cover them with a stone veneer or stucco finish for a more polished appearance.
- Repurposed Furniture: Get creative! An old dresser, sideboard, or metal workstation can be repurposed into a fantastic outdoor kitchen island. You’ll need to sand it down and apply several coats of exterior-grade paint and sealer for protection, but this approach adds unique character and saves a fortune.
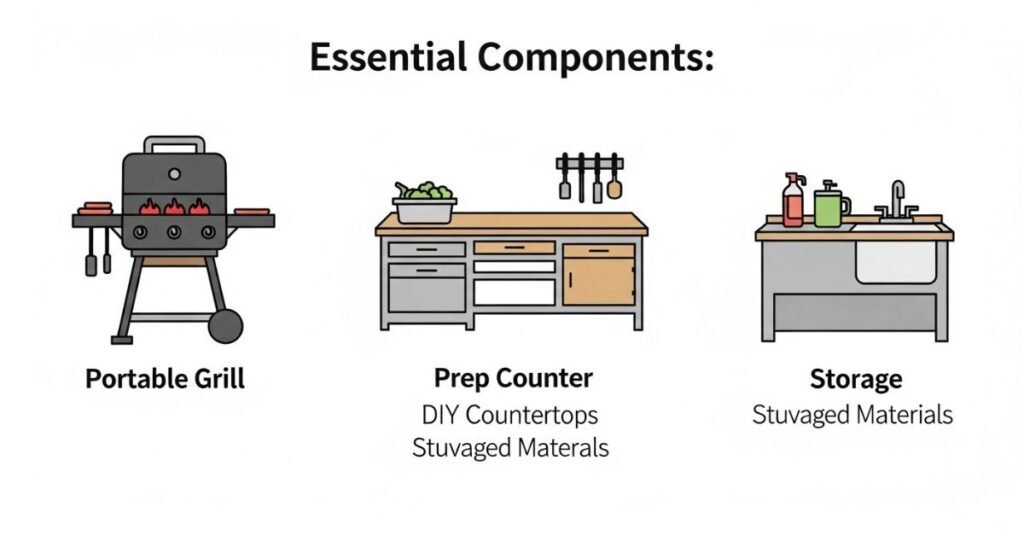
Choosing Appliances Without Overspending
Appliances are the heart of the kitchen. While it’s tempting to go for the biggest and best, smart choices here can save you thousands.
The Grill: Your Most Important Purchase
This is the one area where you should stretch your budget as much as possible. A cheap, flimsy grill will rust quickly and cook unevenly, leading to frustration. You don’t need a massive built-in model with every feature imaginable. Look for a high-quality freestanding cart-style grill from a reputable brand.
A stainless steel grill on a cart offers mobility and can be slotted into a space in your counter setup. This gives you the look of a built-in without the high cost and permanence. When it fails years down the road, you can simply roll it out and replace it without having to demolish your countertops.
Do You Really Need a Sink?
An outdoor sink is convenient, but running plumbing can be one of the most expensive parts of the project. Ask yourself if you truly need it. If your outdoor kitchen is close to your indoor kitchen, you might be able to manage without one.
If a sink is a must-have, consider a simpler, cheaper alternative to a fully plumbed hot-and-cold setup:
- Connect to a Hose Spigot: Install a simple utility sink and connect the faucet to a garden hose using a splitter. This gives you cold running water for rinsing hands and vegetables without the cost of a plumber.
- Dry Sink Station: Incorporate a drop-in sink basin with no plumbing. You can use it for holding ice and drinks or as a station for washing vegetables with water brought from inside.
Refrigeration on a Budget
Outdoor-rated refrigerators are built to withstand temperature fluctuations and humidity, but they come with a hefty price tag.
- Use a High-Quality Cooler: For many people, a premium, well-insulated cooler is more than enough. It can keep drinks and food cold for days and requires no electricity.
- Indoor Mini-Fridge: If your covered kitchen is well-protected from direct rain, you might be able to get away with using a standard indoor mini-fridge. They are a fraction of the cost of an outdoor model. Just be aware that they will have to work harder in hot weather and their lifespan may be shorter.
Tying It All Together for Any Home Style
Your inexpensive outdoor kitchen can be tailored to match the aesthetic of your home, whether it’s modern, rustic, or traditional.
- For a Modern Home: Opt for clean lines and a simple color palette. A cinder block base painted a dark charcoal grey, topped with poured concrete countertops and covered by a lean-to with black metal roofing, creates a sleek, minimalist look.
- For a Rustic or Farmhouse Style: Embrace natural materials. A frame made of pressure-treated wood and clad in reclaimed pallet wood or corrugated metal fits this style perfectly. A cedar pergola with a canvas cover and a sealed butcher block countertop completes the warm, inviting feel.
- For a Traditional Home: Create a classic look with a pressure-treated frame covered in stone veneer panels that complement your home’s exterior. Use large format porcelain tiles that mimic travertine for the countertops. An L-shaped layout under a classic gabled pergola will feel like a timeless extension of your home.
Your Dream Outdoor Kitchen is Within Reach
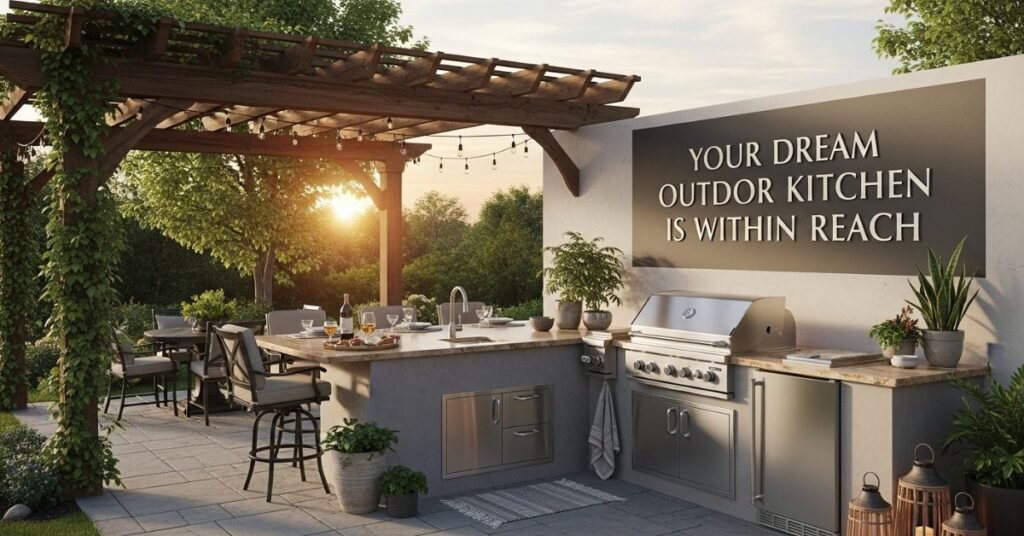
Building an outdoor kitchen on a budget is not about cutting corners on quality; it’s about making smart, strategic decisions. By focusing your spending on a durable grill and a protective cover, you lay the foundation for a space that will serve you for years. Embracing DIY-friendly materials like poured concrete, getting creative with structures like cinder block bases, and opting for flexible appliance solutions allow you to build a custom space without the custom price tag.
Start by creating your plan. Define your essentials, choose a location, and select a layout. From there, you can begin sourcing materials and building the covered outdoor kitchen you’ve always wanted.
Ready to take the first step? Begin by measuring your space and sketching out a simple linear or L-shaped layout. This small action will make your project feel real and set you on the path to alfresco cooking and entertaining.
Realistic Budget Breakdown
Here’s a sample cost breakdown for an inexpensive covered outdoor kitchen under $3,000:
| Item | Estimated Cost |
|---|---|
| DIY pergola or canopy | $600 |
| Grill (mid-range gas or charcoal) | $300 |
| Concrete or tile countertop | $250 |
| Base (pavers or concrete blocks) | $400 |
| Sink setup (basic hose + bar sink) | $100 |
| Furniture & décor | $500 |
| Lighting & accessories | $150 |
| Miscellaneous | $200 |
| Total | ≈ $2,500 |
Conclusion
You don’t need a luxury budget to create a beautiful, functional outdoor kitchen. With a clear plan, smart material choices, and a little creativity, you can design an inexpensive covered outdoor kitchen that reflects your personality and enhances your lifestyle.
Whether your home is modern, rustic, or coastal, the key is balance — combining practicality, style, and affordability. Start small, DIY where you can, and gradually build your dream outdoor space.
Ready to Begin?
Start sketching your layout, gather inspiration, and take that first step toward transforming your backyard into your favorite “room” in the house.
Your affordable outdoor kitchen is waiting — you just have to build it.