Introduction: Why Draining Your Plumbing System Matters
Imagine waking up after a freezing winter night only to find burst pipes, water flooding your basement, or strange gurgling sounds coming from your faucets. These situations often have one thing in common — an improperly drained plumbing system.
Whether you’re preparing for winter, doing major plumbing repairs, or leaving your home vacant for a while, draining your home’s plumbing system is an essential maintenance task that every homeowner should understand.
It might sound complicated, but with the right steps, tools, and precautions, anyone can do it safely. This comprehensive guide will walk you through how to drain your home’s plumbing system step-by-step, explain why and when you should do it, and share pro tips from plumbing experts to help you prevent costly water damage.
What Does It Mean to Drain a Plumbing System?
Draining your plumbing system means removing water from all the pipes, fixtures, and appliances in your home. This includes sinks, toilets, bathtubs, washing machines, dishwashers, and water heaters.
When water sits in pipes, it can freeze during cold weather, causing expansion and potentially bursting the pipes. Even in non-freezing conditions, stagnant water can lead to bacterial growth or corrosion in older systems.
Common Reasons Homeowners Drain Their Plumbing Systems
- Winterizing a property (especially for vacation homes or cabins)
- Preparing for major plumbing work or renovations
- Leaving the house vacant for long periods
- Flushing out sediment buildup from pipes and heaters
- Preventing damage before moving out or selling a home
Draining isn’t just for emergencies — it’s smart preventive maintenance that extends your plumbing system’s lifespan.
When Should You Drain Your Plumbing System?
Timing is everything when it comes to plumbing maintenance. Here are key situations when you should plan a full drain:
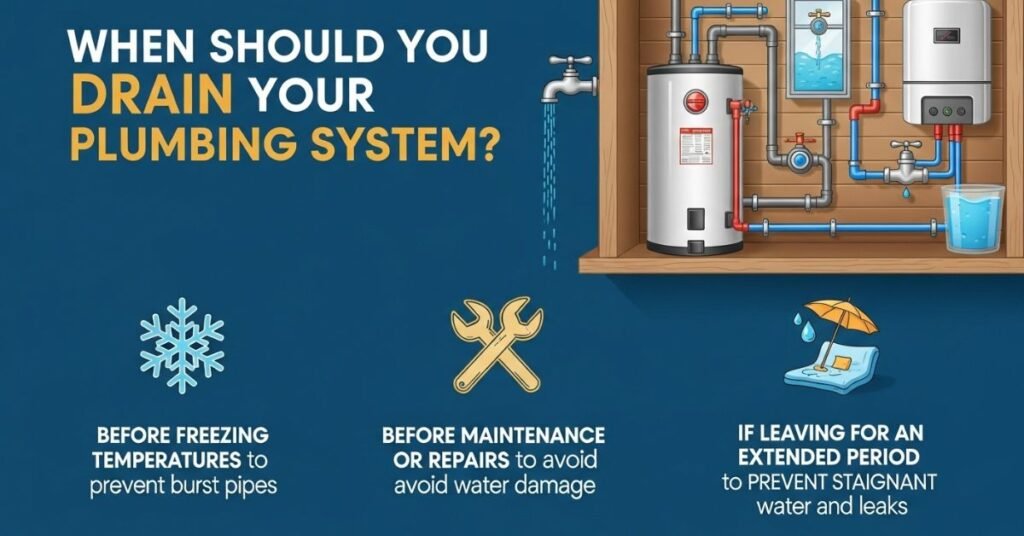
1. Before Winter or Freezing Weather
If you live in a region with sub-zero temperatures, frozen pipes are a major risk. Draining ensures no water remains to freeze and expand inside pipes.
2. Before Extended Vacations
If you’re leaving your home unattended for several weeks or months, draining prevents water stagnation, which can cause foul odors, corrosion, or leaks.
3. Before Major Repairs or Remodels
Plumbers often drain systems before installing new fixtures, replacing pipes, or upgrading water heaters to avoid water messes and pressure hazards.
4. After Plumbing Contamination
If your water supply becomes contaminated (e.g., after a backflow incident or flood), a full drain and flush help restore water quality.
Tools and Materials You’ll Need
Before getting started, gather these essential tools:
- Adjustable wrench or pipe wrench
- Screwdriver set
- Garden hose (for water heater draining)
- Bucket and towels
- Air compressor (optional, for blowing out residual water)
- Plumber’s tape (for reassembly)
- Safety gloves and goggles
Pro Tip: Keep a notebook or phone handy to label valves and record which fixtures have been drained — this helps you stay organized during reassembly.
Want to learn more? Check out these related articles.
Step-by-Step: How to Drain Your Home’s Plumbing System
Let’s break down the process step-by-step so you can confidently drain your plumbing system without calling a professional (though one can always help if needed).
Step 1: Turn Off the Main Water Supply
Locate your home’s main water shut-off valve. It’s usually near the water meter or where the main water line enters your home. Turn it clockwise to shut off the water supply completely.
Tip: For added safety, also shut off the water to outdoor spigots and any secondary lines.
Step 2: Turn Off the Water Heater and Appliances
If you have an electric water heater, switch off its circuit breaker. For gas heaters, turn the gas control valve to the “pilot” or “off” position.
Also, disconnect water supply lines to appliances like dishwashers and washing machines.
This prevents damage to heating elements and avoids unnecessary pressure buildup.
Step 3: Open All Faucets and Fixtures
Start from the highest point in your home (like an upstairs bathroom) and work downward. Open every faucet, showerhead, and outdoor spigot.
By allowing air in from the top, water drains more efficiently from the lower pipes. Don’t forget to open the cold and hot taps separately.
Step 4: Flush Toilets and Drain Tanks
Flush each toilet to empty the tank and bowl.
If water remains in the bowl, use a sponge or a wet-dry vacuum to remove the last bit. Pour a small amount of non-toxic antifreeze into each bowl if you’re winterizing your system — this prevents any trapped water from freezing.
Step 5: Drain the Water Heater
Attach a garden hose to the drain valve at the bottom of your water heater.
Run the hose to a floor drain or outside area. Open the valve and let the water drain completely.
Once empty, briefly turn on the cold water supply to flush out any sediment, then drain again.
Note: Sediment buildup can cause your heater to work harder and consume more energy, so this step also improves efficiency.
Step 6: Drain Outdoor Spigots and Sprinkler Systems
Outdoor plumbing lines are the first to freeze. Open all outdoor spigots and let them drain.
If you have a sprinkler or irrigation system, blow out remaining water with an air compressor using the manufacturer’s pressure recommendations.
Step 7: Blow Out Residual Water (Optional)
For a more thorough drain, use an air compressor to blow remaining water from pipes.
Start at the lowest faucet and work upward, keeping air pressure around 30–40 PSI to avoid damaging pipes.
Step 8: Check All Traps and Low Points
Inspect P-traps under sinks and floor drains — these are common places where water lingers. Remove the traps (place a bucket underneath first) and drain them manually.
If you’re winterizing, pour a bit of RV antifreeze into each drain trap to prevent freezing and odor backflow.
Step 9: Confirm Everything Is Drained
Once you’ve drained all fixtures, go back through your home and double-check:
- Faucets run dry
- Toilets empty
- Water heater drained
- Outdoor lines cleared
Now your plumbing system is officially dry and protected.
How to Refill and Restart Your Plumbing System
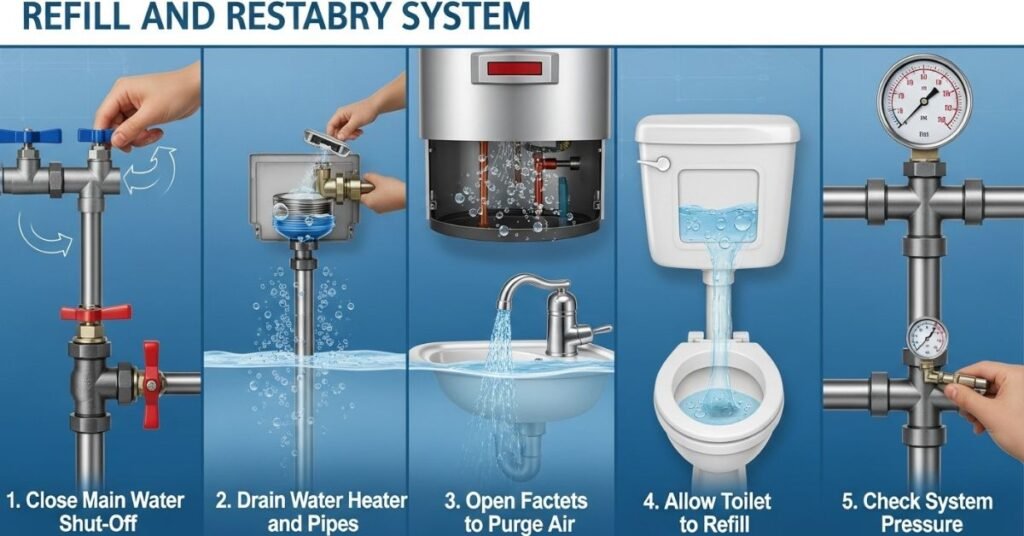
When it’s time to return or turn the water back on, do it carefully to avoid water hammer or pressure surges.
- Close all open faucets and valves.
- Slowly open the main shut-off valve.
- Turn on one faucet at a time (starting from the lowest point) to let air escape.
- Reconnect appliances like dishwashers and washing machines.
- Restore power/gas to your water heater once it’s full.
Run the water for a few minutes to clear any air or debris.
Expert Tips for Safe and Effective Draining
- Know your system layout: Identify supply lines, shut-off valves, and drains before starting.
- Use the right pressure: Never exceed 40 PSI when blowing out lines.
- Avoid chemical antifreeze: Only use RV or plumbing-safe antifreeze, never automotive types.
- Label valves: Mark which valves serve which areas for future ease.
- Inspect while draining: Look for corrosion, leaks, or mineral buildup — signs you may need maintenance.
Common Mistakes to Avoid
- Forgetting the water heater — leaving it full can cause damage or freezing.
- Skipping low-point drains — trapped water here can freeze or cause bursts.
- Reopening valves too fast — sudden pressure can loosen fittings.
- Not turning off electricity/gas before draining heaters.
- Using the wrong antifreeze — toxic types can contaminate your system.
Avoiding these errors will keep your plumbing system safe and functional for years.
Professional vs. DIY Draining: Which Is Right for You?
While draining your plumbing system can be done yourself, sometimes hiring a licensed plumber is worth it.
| Situation | DIY Suitable? | Professional Recommended? |
|---|---|---|
| Winterizing a small home | ✅ | |
| Large homes with multiple zones | ✅ | |
| Irrigation systems | ✅ | |
| After contamination/flood | ✅ | |
| Quick repairs or maintenance | ✅ | |
| No plumbing experience | ✅ |
If your system is complex or includes radiant heating or multiple supply loops, a professional plumber ensures a full drain and prevents costly mistakes.
Maintenance After Draining
Once your system is drained, do these quick maintenance checks:
- Inspect exposed pipes for cracks or leaks.
- Clean faucet aerators and showerheads.
- Check the anode rod in your water heater.
- Lubricate shut-off valves to keep them from seizing.
Performing these small tasks ensures smooth operation when refilling.
FAQs: Draining Your Home’s Plumbing System
1. How long does it take to drain a plumbing system?
For an average home, draining takes 1 to 2 hours, depending on the size and number of fixtures. Larger or multi-level homes may take longer.
2. Can I drain only part of the system (like upstairs or outdoor lines)?
Yes, you can isolate specific sections using shut-off valves. However, for full winterization, it’s best to drain the entire system.
3. Is antifreeze necessary for draining?
Not always. If all water is fully drained, you may skip antifreeze. But in freezing climates, a small amount of non-toxic RV antifreeze adds extra protection.
4. Do tankless water heaters need draining?
Yes, but differently. Tankless heaters should be flushed with a vinegar solution or manufacturer-approved cleaner to remove scale, not just drained.
5. What happens if I skip draining before winter?
Standing water can freeze, expand, and burst pipes, leading to thousands of dollars in water damage and repairs.
6. Can draining fix low water pressure issues?
It can help temporarily by clearing sediment buildup, but persistent low pressure often means clogged lines, valve issues, or municipal supply problems.
7. Should I call a plumber to check my work?
If it’s your first time or your home has a complex plumbing layout, having a plumber verify the drain is smart and inexpensive peace of mind.
Conclusion: Protect Your Home Before Problems Arise
Draining your home’s plumbing system might not seem exciting, but it’s one of the smartest preventive measures you can take as a homeowner. From avoiding frozen pipes to maintaining water quality, it saves money, time, and stress.
Remember:
- Turn off the main water supply.
- Open all faucets from top to bottom.
- Drain the water heater and outdoor lines.
- Use antifreeze where necessary.
Whether you do it yourself or call a pro, the key is planning ahead. By learning how to properly drain your plumbing system, you’re not just maintaining your home — you’re protecting it.
Call to Action
If you’re unsure about your plumbing system’s layout or want professional help preparing for winter, contact a licensed plumber in your area today. A quick inspection can prevent expensive surprises down the line.
Want to learn more? Check out these related articles.